Google Web Toolkit (GWT) & Eclipse
Step 1) Create Eclipse Project:
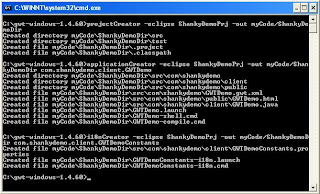
C:\gwt-windows-1.4.60>projectCreator -eclipse ShankyDemoPrj -out myCode/ShankyDemoDir
Step 2) Create GWT Code Sample:
C:\gwt-windows-1.4.60>applicationCreator -eclipse ShankyDemoPrj -out myCode/ShankyDemoDir com.shankydemo.client.GWTDemo
Step 3) Setup Internationalization:
C:\gwt-windows-1.4.60>i18nCreator -eclipse ShankyDemoPrj -out myCode/ShankyDemoDir com.shankydemo.client.GWTDemoConstants
To create/update the Java constant file run the newly created "-i18n.cmd" in the root folder and it would generate/update the Java constant file.
Step 4) Import the project created to Eclipse (as shown in figures below):
If you want to add a specific CSS file into project:
Add following into the.gwt.xml file:
within the

This article has moved to my new BLOG.
C:\gwt-windows-1.4.60>projectCreator -eclipse ShankyDemoPrj -out myCode/ShankyDemoDir
Step 2) Create GWT Code Sample:
C:\gwt-windows-1.4.60>applicationCreator -eclipse ShankyDemoPrj -out myCode/ShankyDemoDir com.shankydemo.client.GWTDemo
Step 3) Setup Internationalization:
C:\gwt-windows-1.4.60>i18nCreator -eclipse ShankyDemoPrj -out myCode/ShankyDemoDir com.shankydemo.client.GWTDemoConstants
To create/update the Java constant file run the newly created "
Step 4) Import the project created to Eclipse (as shown in figures below):
If you want to add a specific CSS file into project:
Add following into the
within the

This article has moved to my new BLOG.
Labels: AJAX, Demo, Eclipse, Google, GWT, Internet, Toolkit, Web


0 Comments:
Post a Comment
<< Home